SMA Monitoring System Setup

How to Connect or Reconnect Your SMA Inverter to Your Modem / Router
*This will allow you to restore or partially set up your SMA monitoring if connecting for the first time. If you are setting this up for the first time, call us at (801) 783-3310 once completed and we will register your account.
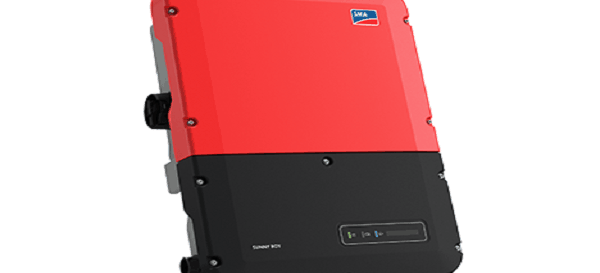
- Get on a device that can communicate with wifi. *A smartphone is recommended for ease. On this device, search for and select the wireless network of your SMA inverter. This will be “SMA…” followed by the serial number of your inverter. *This will likely be the only signal in your area that begins with SMA… so knowing your serial number is usually not necessary to distinguish.
- Select this signal and enter the the password to login. If your wifi has been set up before, the password is the WPA2-PSK number. This can be located on a sticker on the lower right side of your inverter. The code is found at the bottom of that sticker. If you are setting up your wifi connection for the first time, the password may be SMA12345. *See photos below. Do NOT enter “WPA2-PSK” as part of the password and be aware the password IS case sensitive.

- Once connected to the SMA inverter’s signal, open a web browser on the device you logged in with and enter 192.168.12.3 into the URL bar. This is where you normally enter website names. In doing this, your browser will try to warn you that the page is unsafe. Proceed through warnings and you will be taken to the login page.
- Now, the SMA login page should be displayed in your web browser. Follow the instructions below and login.
- Select Language: *Your choice.
- Select User Group: Installer
- Enter Password: G0S0lar1. *The 0’s are zeros. Call us if this does not work.
- Once logged in, Look for a small square at the top right of the screen. Press this Icon and a drop down selection will appear. *See photos below.
- A new screen will appear. Select the “WLAN” tab, and choose the desired network to connect to. Press the gear icon to the right of your wifi network and enter your wifi password. Then, press the “Connect to WLAN”. *See photos below.

- Now, scroll down on this same page and press the “save and next” tab, located on the bottom right. Without changing settings, repeat this on all following windows until you arrive back at the home screen. This screen displays your “device status” at the top of the page. *See photo below. If connecting this for the first time you will be disconnected from the inverter after connecting the inverter to your wifi.

- Finally, look to see that you have a solid blue light on the front of your inverter. Be aware however, this can take a few minutes to turn blue so give this process time. At first, it will flash but will eventually turn solid blue. Once this light is on, knock on the display until you see the screen below to ensure that the “SSID” displays your wifi name and a signal strength percentage beneath. If so, your network change is COMPLETE! *Be aware that signal strength will vary.

*If you’re having trouble connecting your SMA inverter, please contact us.


Send a Message
Oops! We could not locate your form.